Create Step-by-Step SVG Sprites in WordPress
2 weeks ago · Updated 2 weeks ago

Performance is not optional in modern web development. Users expect pages to load instantly, search engines reward fast-loading sites, and every unnecessary HTTP request is a friction point that slows the user experience. Among the many techniques available to web developers for improving site performance — caching, lazy loading, minification, CDNs — SVG Sprites stand out as one of the most elegant and underutilized.
An SVG Sprite is a single SVG file (or inline SVG block) that contains multiple SVG icons bundled together as individual symbols. Instead of loading separate image files for each icon — a logo, social media icons, UI icons, decorative illustrations — you load one sprite and reference individual icons from it by their symbol ID. The result is dramatically fewer HTTP requests and a cleaner, more maintainable icon management system.
For WordPress theme developers, SVG Sprites offer particular advantages. WordPress themes typically include dozens of icons across the header, footer, navigation, CTAs, and social links. Managing these as separate image files is messy and inefficient. Bundling them into a sprite — whether inline in the document or as an external cached file — is the professional approach, and it is the approach this guide teaches.
This comprehensive guide covers two methods for implementing SVG Sprites in WordPress themes. The first method embeds the SVG Sprite inline in the document, making it immediately accessible to CSS and JavaScript. The second method uses an external SVG file that the browser caches after the first request, saving HTTP requests on subsequent pages. Both methods are valid; which to choose depends on your specific use case and performance goals.
We will walk through the complete process: understanding what SVG Sprites are and why they improve performance, optimizing SVG files with SVGO, creating the sprite file, organizing symbols, including the sprite in a WordPress theme using PHP, rendering icons with the use element, and handling CSS styling of sprites across different contexts. By the end, you will have a production-ready SVG Sprite system in your WordPress theme.
| WHAT YOU WILL BUILD Project Overview
A WordPress theme page with an animated header (logo changes color on scroll), a call-to-action with handmade SVG illustration and icon, and a footer with four social media icons — all served from a single SVG Sprite using either inline or external delivery methods. |
| 1
Sprite File Replaces all individual icon HTTP requests |
2
Methods Inline DOM sprite vs external cached file |
100%
CSS Control Override colors, sizes, hover states freely |
Understanding SVG Sprites and Image Sprites
What Are Image Sprites?
An image sprite is a single image file that contains multiple images combined into one. The technique originated with CSS sprites for raster images (PNG, JPEG): a developer would arrange multiple icons side by side in one large image file, then use CSS background-position to display only the relevant portion of the combined image for each icon.
The performance benefit is straightforward. Without sprites, loading 12 icons requires 12 HTTP requests. With a sprite, loading 12 icons requires 1 HTTP request for the combined file, then CSS rules to position the view over each individual icon. HTTP requests are expensive — each one involves DNS lookup, TCP connection, TLS handshake, request transmission, and response transmission. Reducing request count directly reduces page load time, particularly on mobile connections and high-latency networks.
CSS sprites with raster images have significant limitations, however. They produce pixelated results when scaled, require regenerating the sprite image whenever any icon changes, are difficult to modify the color of via CSS, and are not resolution-independent (they look poor on high-DPI displays without maintaining multiple size variants). SVG Sprites solve all of these problems.
SVG Sprites — The Modern Solution
SVG (Scalable Vector Graphics) is an XML-based vector image format. Unlike raster images, SVGs are resolution-independent — they scale to any size without quality loss. An SVG icon that looks perfect at 16px looks equally perfect at 256px, on a standard display and on a 5x Retina display.
An SVG Sprite takes the HTTP-request-reduction benefit of traditional CSS sprites but replaces the hacky background-position technique with a much cleaner mechanism: the SVG symbol and use elements. You define each icon as a symbol with a unique ID inside the sprite, then reference it anywhere on the page with a use element pointing to that ID.
The advantages over traditional CSS sprites and individual SVG files are substantial. SVG Sprites are resolution-independent. Colors and styles can be overridden via CSS using the currentColor value and CSS custom properties. Icons can be animated via CSS or JavaScript. The same sprite can serve icons at any size without maintaining multiple files. And the entire collection of icons can be edited in a single file.
How the Symbol/Use Pattern Works
The core SVG Sprite mechanism uses two elements. The symbol element defines a reusable graphic with its own coordinate system (viewBox) and an identifying ID attribute. Multiple symbols can be defined inside a single SVG container, which is typically hidden with display:none to prevent it from taking up space on the page.
The use element references a defined symbol by its ID and renders it at the desired location. A single symbol can be referenced by multiple use elements across the page, and each use instance can be independently styled. The use element accepts width and height attributes to control the rendered size of the icon at each usage point.
This pattern is analogous to defining functions in programming: you define the graphic once (the symbol) and call it wherever needed (the use element), with the ability to customize the call at each usage point. The result is DRY (Don't Repeat Yourself) SVG code that is easy to maintain — change the symbol definition once, and all use instances update automatically.
Project Setup and File Structure
WordPress Theme Architecture for This Tutorial
This tutorial uses a custom WordPress theme called Playground — a theme purpose-built for demonstrating WordPress development techniques. The theme uses a standard WordPress theme file structure with a partials folder for reusable template parts and an assets/img folder for SVG files.
The page layout we will build contains three main sections. The header contains the theme logo as an SVG. The logo displays in dark blue by default and transitions to white when the header receives a red background on scroll — a state change handled by JavaScript and CSS. The main content section contains a call-to-action element with a handmade SVG illustration as its background and a Feather icon next to the CTA text. The footer contains four columns, the last of which holds social media icons for Facebook, Instagram, LinkedIn, and YouTube.
We will use SVGs from four different sources: a custom handmade illustration from a previous tutorial, a send icon from the Feather icon library, social icons from the Font Awesome library, and a custom logo created in Adobe Illustrator. This diversity is intentional — in real projects, you will typically source icons from multiple libraries, and the SVG Sprite technique works equally well regardless of the source.
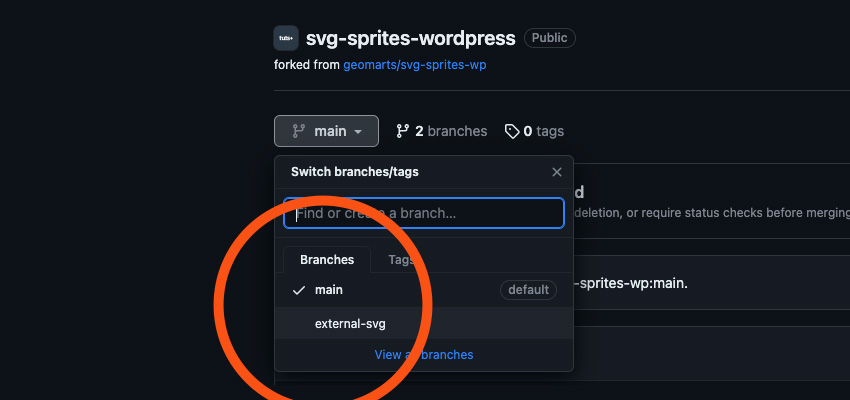
The GitHub Repository Structure
The tutorial project lives in a GitHub repository with two branches serving different purposes. The main branch contains all files for Method 1 — the inline SVG Sprite approach where the sprite is embedded directly in the document. The external-svg branch contains the files for Method 2 — the external SVG file approach where the sprite exists as a separate file that the browser caches after the first request.
The key files in the main branch include sprites.php (the PHP file containing the SVG Sprite markup, located in the partials folder), logo.php (the PHP template part for rendering the logo), header.php (which includes the sprite and logo template parts), functions.php (the theme functions file), and the CSS and JavaScript files that handle the visual presentation and scroll behavior.
Creating the SVG Sprite — Method 1 (Inline)
Setting Up the Sprite Container
The first step in creating an inline SVG Sprite is establishing the sprite container — the SVG element that will hold all icon symbols and be embedded at the top of the document. Create a new PHP file called sprites.php in your theme's partials folder. The choice to use a PHP file rather than a plain SVG file allows WordPress template functions to be used within the sprite, which can be useful for dynamic content.
The sprite container is a standard SVG element with one critical addition: display:none styling to prevent the sprite from taking up any visual space on the page. Without this, the browser renders an empty area at the top of the page where the hidden sprite would otherwise appear. The inline style attribute is the simplest way to apply this hiding.
| PHP / HTML |
| <!-- sprites.php in the partials folder --> |
| <svg style="display: none"> |
| <?php /* All icon symbols go inside this container */ ?> |
| </svg> |
Include this file in your theme's header.php using WordPress's get_template_part() function. This function loads the specified template part file, making it available in the document before any visible content renders — which is where the sprite needs to be for the use element references to work correctly.
| PHP |
| <?php |
| // In header.php, before the visible page content |
| get_template_part( 'partials/sprites' ); |
| ?> |
Optimizing SVGs with SVGO Before Adding to Sprite
Raw SVG files exported from design tools like Adobe Illustrator contain significant amounts of unnecessary markup: XML declarations, export metadata, comments, redundant attributes, excessive decimal precision in path coordinates, and unneeded namespace declarations. Before adding any SVG to your sprite, optimize it with SVGO — a Node.js-based SVG optimization tool that can dramatically reduce file size while preserving visual fidelity.
SVGO is available as a command-line tool installed via npm, or as the web-based SVGOMG interface (available at jakearchibald.github.io/svgomg) for quick one-off optimization. The web interface is particularly convenient for tutorial work — paste your SVG code, configure the optimization options, and copy the optimized output.
Consider the difference SVGO makes to a real SVG. The Adobe Illustrator logo export begins with XML version declarations, generator metadata comments, redundant attributes like version, enable-background, xml:space, x, and y attributes on the root element, explicit fill='#FFFFFF' on every path element, and full decimal precision in every path coordinate. After SVGO optimization, all of this noise is removed: the generator comments go, the redundant attributes go, the file size drops significantly, and the paths remain visually identical.
When optimizing SVGs for a sprite, be aware that SVGO's behavior can vary based on its configuration. The most important thing to preserve is the viewBox attribute — do not let SVGO remove it, as the sprite mechanism depends on viewBox to correctly scale icons when rendered via use elements. Also consider whether you want SVGO to remove fill attributes — for icons where you want CSS to control color, removing fill is desirable; for multi-color illustrations where fills define the visual design, they should be preserved.
Converting SVGs to Symbols
Converting an optimized SVG to a sprite symbol requires three changes. First, replace the svg root element with a symbol element. Second, move the viewBox attribute from the svg to the symbol (preserving it is critical). Third, add a unique id attribute to the symbol that you will use to reference it in use elements. Remove any other attributes from the original svg element that are not needed on the symbol.
Here is a concrete example using the logo SVG. The optimized logo starts as a root SVG with viewBox='0 0 178 38'. Converting it to a symbol:
| SVG / HTML |
| <!-- Before: standalone SVG (simplified) --> |
| <svg xmlns="http://www.w3.org/2000/svg" viewBox="0 0 178 38"> |
| <g fill="#FFF"> |
| <path d="M50.1 30.2c0 .4..."/> |
| </g> |
| <path fill="#FFF" d="M19 38C8.5..."/> |
| </svg> |
| <!-- After: symbol inside sprite --> |
| <symbol id="logo" viewBox="0 0 178 38"> |
| <g> |
| <path d="M50.1 30.2c0 .4..."/> |
| </g> |
| <path d="M19 38C8.5..."/> |
| </symbol> |
Notice that fill='#FFF' has been removed from the logo symbol. This is intentional: the logo appears in both the header (dark background — white logo) and the footer (also white), but the header also needs the logo in dark blue on initial load before scroll. By removing the hardcoded fill, we allow CSS to control the logo color in each context through the fill and color properties. This is one of the key advantages of SVG Sprites over raster image approaches.
Handling the CTA Illustration and Feather Icon
The CTA section uses two distinct SVGs. The first is a handmade illustration that will serve as the background of the call-to-action button — it needs to stretch and deform to fill the entire CTA dimensions regardless of the button's size. The second is the Feather 'send' icon that appears inline with the CTA text.
For the illustration (the organic button shape), adding preserveAspectRatio='none' to the symbol is essential. By default, SVGs scale with preserved aspect ratios — they never stretch or distort. But for a background shape that must fill an arbitrary container, we want it to stretch freely. The preserveAspectRatio='none' value instructs the SVG to scale independently in X and Y directions, effectively stretching to fill whatever space it is given.
| SVG / HTML |
| <!-- Handmade illustration symbol --> |
| <!-- preserveAspectRatio="none" allows free stretching --> |
| <symbol id="button" viewBox="0 0 256.6 60.02" preserveAspectRatio="none"> |
| <path d="M3.98 0c9.31-.01 18.44.99..."/> |
| </symbol> |
| <!-- Feather send icon symbol --> |
| <!-- stroke="currentColor" inherits parent element color --> |
| <symbol id="send" viewBox="0 0 24 24" fill="none" |
| stroke="currentColor" stroke-width="2" |
| stroke-linecap="round" stroke-linejoin="round"> |
| <line x1="22" y1="2" x2="11" y2="13"></line> |
| <polygon points="22 2 15 22 11 13 2 9 22 2"></polygon> |
| </symbol> |
The Feather icon uses stroke='currentColor' — one of SVG's most powerful CSS integration features. The currentColor keyword means 'use whatever the CSS color property is set to on this element or its nearest ancestor with a color value.' In the CTA context, we will set color: white on the CTA link in CSS. The send icon then inherits this white value as its stroke color, automatically matching the CTA text color without requiring any additional CSS targeting of the SVG specifically.
Adding Font Awesome Social Icons
Font Awesome icons require minimal transformation to convert to sprite symbols. The Font Awesome SVG export includes the xmlns declaration, the icon's viewBox, and comments with license information. Strip the comments and xmlns attribute, change svg to symbol, keep the viewBox, add the ID, and you have a ready-to-use symbol.
| SVG / HTML |
| <!-- Font Awesome Facebook icon as sprite symbol --> |
| <symbol id="facebook" viewBox="0 0 512 512"> |
| <path d="M504 256C504 119 393 8 256 8S8 119 8 256 |
| c0 123.78 90.69 226.38 209.25 245V327.69h-63V256h63 |
| v-54.64c0-62.15 37-96.48 93.67-96.48 27.14 0 55.52 |
| 4.84 55.52 4.84v61h-31.28c-30.8 0-40.41 19.12-40.41 |
| 38.73V256h68.78l-11 71.69h-57.78V501C413.31 482.38 |
| 504 379.78 504 256z"/> |
| </symbol> |
| <!-- Repeat same pattern for instagram, linkedin, youtube --> |
The complete sprites.php file will contain the outer SVG container (hidden with display:none) and all symbols inside it: logo, button (illustration), send (Feather icon), facebook, instagram, linkedin, and youtube. This single file replaces what would otherwise be seven separate image file requests.
Rendering SVG Sprite Icons in WordPress
The Logo in Header and Footer
Create a logo.php template part in your theme's partials folder. This file contains the anchor tag that wraps the logo SVG. The use element references the logo symbol by its ID, and the SVG element has explicit width and height attributes that match the logo's natural dimensions (178 by 38 pixels as defined in the viewBox).
| PHP / HTML |
| <?php /* partials/logo.php */ ?> |
| <a class="logo" href="<?php echo esc_url( home_url( '/' ) ); ?>" |
| aria-label="forecastr logo"> |
| <svg width="178" height="38" role="img"> |
| <use href="#logo"></use> |
| </svg> |
| </a> |
Include this logo template part in both header.php and footer.php using get_template_part(). The same logo.php file renders the logo in both locations, but CSS handles the color difference: in the header, the logo starts dark blue and transitions to white on scroll; in the footer, it is always white.
Use href rather than the deprecated xlink:href attribute to reference the symbol. Modern browsers support the href attribute directly on use elements. If you need to support very old browsers (Internet Explorer), use both attributes: xlink:href='#logo' href='#logo'. For most projects in 2024, href alone is sufficient.
| ACCESSIBILITY NOTE SVG Role and ARIA
For functional SVGs like the logo, use role='img' on the SVG element and include a descriptive aria-label on the containing anchor tag. For purely decorative SVGs (icons that are accompanied by text labels), use aria-hidden='true' to hide them from screen readers, preventing redundant announcement of the icon. |
The CTA with Illustration and Icon
The CTA (call-to-action) element uses both SVGs differently. The illustration serves as an absolutely-positioned background that covers the full link area, creating the organic hand-drawn button shape. The send icon appears inline next to the text. Both are purely decorative and use aria-hidden='true'.
| PHP / HTML |
| <?php /* In index.php or template file */ ?> |
| <a class="btn-contact" href=""> |
| <?php esc_html_e( 'Contact us', 'playground' ); ?> |
| <!-- Illustration: no fixed dimensions, fills parent via CSS --> |
| <svg class="shape" aria-hidden="true"> |
| <use href="#button"></use> |
| </svg> |
| <!-- Inline icon: fixed dimensions --> |
| <svg width="24" height="24" aria-hidden="true"> |
| <use href="#send"></use> |
| </svg> |
| </a> |
The illustration SVG (class='shape') has no explicit width and height on the SVG element itself — these will be controlled by CSS position: absolute and width/height: 100% so the shape stretches to fill the entire button. The preserveAspectRatio='none' we added to the button symbol earlier ensures the illustration deforms freely to match whatever dimensions the CSS assigns.
In your CSS, the .btn-contact should have position: relative and the .shape SVG should have position: absolute; top: 0; left: 0; width: 100%; height: 100%; z-index: -1 (or appropriate z-index). This pattern of absolutely positioned SVG backgrounds for buttons is a powerful technique for creating handcrafted, organic-feeling UI elements.
Social Icons in the Footer Widget
The social icons in the footer are added through WordPress's Custom HTML widget — a built-in WordPress block that lets you add arbitrary HTML to widget areas (sidebar/footer columns). This approach keeps the social links manageable through the WordPress admin without requiring theme file edits.
| HTML |
| <!-- Add this in Appearance > Widgets > Footer Column 4 --> |
| <!-- Using the Custom HTML block --> |
| <ul class="socials"> |
| <li> |
| <a href="" aria-label="Find us on Facebook" |
| title="Find us on Facebook" target="_blank"> |
| <svg width="28" height="28" aria-hidden="true"> |
| <use href="#facebook"></use> |
| </svg> |
| </a> |
| </li> |
| <li> |
| <a href="" aria-label="Find us on Instagram" |
| title="Find us on Instagram" target="_blank"> |
| <svg width="28" height="32" aria-hidden="true"> |
| <use href="#instagram"></use> |
| </svg> |
| </a> |
| </li> |
| <!-- Repeat for linkedin and youtube --> |
| </ul> |
Since the icon SVGs are purely decorative (the accessible name comes from the aria-label on the anchor), aria-hidden='true' on the SVG prevents screen readers from announcing a meaningless icon. The anchor's aria-label provides the accessible description: 'Find us on Facebook' is announced, not the SVG content.
CSS Styling of SVG Sprites
Controlling SVG Colors via CSS
One of the greatest advantages of SVG Sprites over raster image sprites is CSS color control. SVG elements respond to the CSS fill and stroke properties just like HTML elements respond to color and background-color. By designing your symbols without hardcoded fill attributes (or with fill='currentColor'), you can control all icon colors from CSS.
The logo provides a clear example. In the sprite, the logo symbol has no fill attributes on its paths. In CSS, you can set different fill values for the logo in different contexts:
| CSS |
| /* Logo in header — default state (dark navy) */ |
| .site-header .logo svg { |
| fill: #1a1a2e; |
| } |
| /* Logo in header — scrolled state (white) */ |
| .site-header.scrolled .logo svg { |
| fill: #ffffff; |
| } |
| /* Logo in footer — always white */ |
| .site-footer .logo svg { |
| fill: #ffffff; |
| } |
| /* Social icons — default state */ |
| .socials a svg { |
| fill: #ffffff; |
| transition: fill 0.25s ease; |
| } |
| /* Social icons — hover state */ |
| .socials a:hover svg { |
| fill: #7dd3fc; /* Light blue */ |
| } |
The JavaScript that adds the scrolled class to the header on scroll does not need to know anything about the SVG logo. It simply adds and removes a class on the header element, and CSS handles the visual transition. This clean separation of concerns — JavaScript manages state, CSS manages appearance — is good architecture.
Hover Transitions and Animations
SVG Sprites support CSS transitions and animations on any SVG property, enabling smooth hover effects that would be impossible with raster image sprites. The social icons' color transition from white to light blue on hover is achieved with a simple CSS transition on the fill property.
More complex animations are also possible. The CTA illustration, for example, changes color on hover to indicate interactivity. In the CSS, setting the fill on .btn-contact:hover .shape with a transition creates a smooth color change that makes the hand-drawn button feel organic and responsive to user interaction.
Method 2 — External SVG File
Converting from Inline to External
The second method for using SVG Sprites in WordPress moves the sprite from an inline element in the document to a separate, externally loaded SVG file. This approach has a significant performance advantage: browsers cache external files after the first request, so on subsequent page loads, the sprite is served from cache with zero network requests.
Converting from the inline method to the external method requires four changes. First, move sprites.php from the partials folder to the img folder and rename it sprites.svg. Second, update the file to be a proper SVG (not a PHP file), removing the display:none style (unnecessary since the file will not be in the DOM) and adding the xmlns namespace declaration. Third, create a PHP function that returns the path to the sprites.svg file. Fourth, update all use elements to reference the full path to the sprites.svg file plus the fragment identifier.
| SVG / HTML |
| <!-- sprites.svg — now in assets/img/ folder --> |
| <!-- No display:none needed — file is not in the DOM --> |
| <svg xmlns="http://www.w3.org/2000/svg"> |
| <!-- All symbol definitions go here, exactly as before --> |
| <symbol id="logo" viewBox="0 0 178 38"> |
| <!-- logo paths --> |
| </symbol> |
| <symbol id="facebook" viewBox="0 0 512 512"> |
| <!-- facebook path --> |
| </symbol> |
| <!-- ... other symbols ... --> |
| </svg> |
The WordPress Path Helper Function
To reference the external SVG file in WordPress template parts and functions, create a simple helper function in functions.php that returns the URL to the sprites.svg file using WordPress's get_template_directory_uri() function.
| PHP |
| <?php |
| /** |
| * Returns the URL to the SVG sprite file. |
| * Used to reference sprites from use elements. |
| */ |
| function print_sprites_path() { |
| echo esc_url( get_template_directory_uri() ) . '/assets/img/sprites.svg'; |
| } |
| ?> |
With this function in place, update logo.php to use the full path plus fragment identifier:
| PHP / HTML |
| <?php /* partials/logo.php — external SVG method */ ?> |
| <a class="logo" href="<?php echo esc_url( home_url( '/' ) ); ?>" |
| aria-label="forecastr logo"> |
| <svg width="178" height="38" role="img"> |
| <!-- Full path to external sprite + fragment identifier --> |
| <use href="<?php print_sprites_path(); ?>#logo"></use> |
| </svg> |
| </a> |
For the social icons added through WordPress's Custom HTML widget, the path must be hardcoded in the widget HTML since PHP functions cannot be used in widget content. Determine the full URL to your sprites.svg file and use it directly:
| HTML |
| <!-- In Custom HTML widget --> |
| <!-- Replace {theme-url} with your actual theme URL --> |
| <ul class="socials"> |
| <li> |
| <a href="" aria-label="Find us on Facebook" target="_blank"> |
| <svg width="28" height="28" aria-hidden="true"> |
| <use href="/wp-content/themes/playground/assets/img/sprites.svg#facebook"> |
| </use> |
| </svg> |
| </a> |
| </li> |
| </ul> |
Browser Caching and Performance
The key performance advantage of the external SVG method is browser caching. When a user first visits any page on your WordPress site, the browser makes one request to load sprites.svg. Assuming the server sends appropriate cache headers (which WordPress's default .htaccess configuration should do for static files), the browser stores the sprite in its cache. On every subsequent page load — including other pages on the same site — the sprite is served from cache with no network request.
This caching benefit is most significant for sites with multiple pages. A user browsing through a WordPress blog or portfolio will request the sprite once and benefit from the cache on every subsequent page. The inline method embeds the sprite in every page's HTML, meaning it is 'loaded' on every page request (though it is included in the page response, not a separate request).
| PERFORMANCE INSIGHT Choosing Between Methods
Use inline sprites when your icons are used on a single page or when you need JavaScript to interact directly with the sprite's DOM elements. Use external sprites on multi-page sites where caching provides meaningful benefit, and when the icons are static without dynamic JS manipulation requirements. |
Method Comparison and Decision Guide
| Feature | Method 1: Inline SVG Sprite | Method 2: External SVG File |
| HTTP Requests | None extra (inline DOM) | 1 request, then cached |
| Browser Caching | Not cacheable | Cached after first load |
| CSS Styling | Full CSS access | Limited cross-origin CSS |
| JavaScript Access | Full DOM access | Limited JS access |
| SVG is in DOM | Yes | No |
| Page Load Impact | Adds to HTML size | Separate cached file |
| Best For | Interactive/animated SVGs | Static icons used across pages |
| WordPress Integration | get_template_part() | Custom path function |
| CORS Issues | None | Possible (same-origin OK) |
| Debugging | Easier (DevTools) | Slightly harder |
The Case for Inline Sprites
The inline sprite method is the right choice when immediate DOM access is important. If your JavaScript needs to query, modify, or animate the sprite symbols directly, inline placement is necessary. The SVG is part of the document's DOM, so JavaScript can access it with standard DOM methods. CSS animations and transitions applied to the symbol definitions affect all use instances simultaneously.
Inline sprites also avoid potential cross-origin issues. External SVG files requested from a different domain cannot be styled with CSS due to browser security restrictions. For most WordPress themes where the sprite is served from the same domain as the HTML, this is not a concern — but it is something to be aware of if you ever serve assets from a CDN on a different domain.
For single-page WordPress installations, landing pages, or applications where every user sees a single page, the inline method makes particular sense. There is no multi-page caching benefit to capture, and the inline method avoids any latency from the external file request on the initial page load.
The Case for External Sprites
The external sprite method is the right choice for multi-page WordPress sites — blogs, portfolios, business sites with multiple pages — where users navigate between pages. The caching benefit is real and meaningful: after the first page load, every subsequent page on the site that uses icons from the sprite loads without the sprite being re-downloaded.
External sprites also keep the HTML cleaner. The page source code does not contain the potentially lengthy SVG symbol definitions, making it easier to inspect and understand the page structure. The sprites.svg file exists as a clearly identified, version-controlled asset that can be updated independently of any template files.
Server-side rendering considerations also favor external sprites in some WordPress configurations. Caching plugins like WP Rocket, W3 Total Cache, and LiteSpeed Cache cache full HTML pages. A page with an inline SVG Sprite gets cached with the sprite embedded, which is fine. But if the sprite updates (new icons added), any cached pages need to be invalidated. With an external sprite file, updating the sprite does not invalidate cached HTML pages.
Best Practices, Optimization, and Advanced Techniques
SVG Optimization Workflow
Establish a consistent SVG optimization workflow before adding icons to your sprite. The recommended workflow is: export or download the SVG, run it through SVGO (command-line for automated workflows, SVGOMG GUI for manual optimization), inspect the output to ensure visual fidelity is preserved, convert to a symbol definition, and add to the sprite file.
For automated workflows, the SVGO command-line tool can be integrated with npm scripts or task runners like Gulp or webpack. This allows SVG optimization to run automatically as part of your build process. When a new icon is added to the source SVG folder, the build process runs SVGO on it, adds it to the sprite, and outputs the optimized result.
Key SVGO configuration options to consider: removeViewBox (disable this — always preserve viewBox for sprite use), removeTitle (enabled is fine for purely decorative icons, but consider disabling for icons that need the title for accessibility), convertColors (can convert hex colors to shorter formats, useful for reducing file size), and mergeStyles (combines inline style attributes into one, reducing redundancy).
Accessibility Best Practices for SVG Sprites
Accessible SVG usage requires different approaches for different types of SVGs. Functional SVGs that convey meaningful information (a logo, an informational diagram) need semantic markup: role='img' on the SVG, and either an aria-label attribute or a title element inside the SVG. Decorative SVGs that exist purely for visual enhancement (icon that duplicates adjacent text, background illustration) should be hidden from assistive technologies with aria-hidden='true'.
- Logos in links: Add aria-label to the anchor element describing the link destination. Add role='img' to the SVG.
- Icons alongside text: If the text label sufficiently describes the action (e.g., a button that says 'Contact us' with a send icon), the icon is decorative. Use aria-hidden='true' on the SVG.
- Stand-alone icon links: If an icon link has no visible text (e.g., a social media icon link), the anchor needs an aria-label and the SVG needs aria-hidden='true'.
- Icons with tooltips: Use both aria-label on the anchor and title on the anchor element. The title provides the browser tooltip on hover.
Managing Large Sprite Collections
As your WordPress theme evolves, your SVG Sprite collection will grow. A theme used across multiple projects might accumulate dozens of icons. Managing this effectively requires organization discipline. Group related symbols with HTML comments in the sprite file (logo symbols, UI icons, social icons, decorative elements). Use a consistent naming convention for symbol IDs: all lowercase, hyphen-separated, descriptive (logo, logo-white, icon-arrow-right, social-facebook).
For large teams, consider maintaining an icon inventory document or a simple visual reference page that displays all available sprite symbols with their IDs. This helps team members use existing icons rather than adding duplicates, and makes it easy to see the full icon set at a glance. A simple WordPress admin page or even a private wp-admin-only page can serve this purpose.
Sprite Generation Tools
While this tutorial creates the SVG Sprite manually — the best approach for learning — production workflows often benefit from automated sprite generation. Several tools can automate the process of combining individual SVG files into a single sprite with proper symbol definitions.
- svg-sprite (npm): A configurable Node.js tool that monitors an SVG directory and automatically generates sprites in various formats including the inline and external formats covered in this tutorial.
- IcoMoon: A web-based icon management tool that lets you upload SVGs, select which icons to include, and export them as a sprite. Particularly useful for icon font-based workflows transitioning to SVG.
- Gulp gulp-svgstore: A Gulp plugin that combines SVG files into a sprite. Integrates well with existing Gulp-based WordPress theme build workflows.
- webpack svg-sprite-loader: A webpack loader that handles SVG sprite generation as part of a modern JavaScript build pipeline.
Troubleshooting Common SVG Sprite Issues
Icons Not Appearing
The most common cause of invisible sprite icons is a missing or incorrect sprite. Verify that the sprite container is actually in the DOM (for inline method) using browser DevTools — inspect the page and look for the hidden SVG element near the top of the body. If it is not there, get_template_part() may not be finding the file — check the file path and name.
For icons that are present in the sprite but not rendering, verify that the ID in the use element's href attribute exactly matches the id attribute on the corresponding symbol element. IDs are case-sensitive. A use element with href='#Logo' will not reference a symbol with id='logo'.
For the external SVG method, open the sprite URL directly in your browser to confirm it is accessible. Also confirm that the URL in the href attribute is correct — use your browser's DevTools Network tab to see if the sprite file is being requested and whether it returns a 200 response or a 404.
CSS Styles Not Applying to SVG Icons
If CSS fill or stroke properties are not affecting your sprite icons, the most likely cause is hardcoded inline fill or stroke attributes on the SVG paths inside the symbol definitions. Inline styles and attributes take precedence over external CSS. Remove fill='#333333' type attributes from the symbol paths if you want CSS control.
For the external SVG method, cross-origin CSS restrictions may prevent styles from applying if the sprite file is served from a different domain than the HTML page. This is not typically an issue when both the HTML and the sprite are served from the same WordPress installation, but it can occur with certain CDN configurations.
SVG Showing Extra Space
An unexpected empty space at the top of a page using the inline SVG Sprite method almost certainly means the display:none style is missing from the sprite container SVG element. Double-check that your sprites.php contains style='display: none' on the outer SVG element.
Similarly, SVG icons rendering with unexpected whitespace below them (a common issue when SVGs are displayed inline) can be fixed by setting the SVG's display to block: svg { display: block; }. Inline SVG elements have the same baseline alignment behavior as inline text elements, which can cause spacing issues in certain layout contexts.
Conclusion: SVG Sprites as Professional WordPress Development Practice
SVG Sprites are one of those techniques that, once adopted, become a non-negotiable part of a professional WordPress theme development workflow. The combination of performance benefits (fewer HTTP requests, browser caching with external sprites), visual quality (resolution-independent scaling), and CSS control (dynamic color changes, hover transitions, context-dependent styling) makes SVG Sprites superior to every alternative approach for icon management in WordPress themes.
The two methods covered in this guide — inline SVG Sprites and external SVG file sprites — address different use cases with the same underlying symbol/use mechanism. Use inline sprites when you need JavaScript DOM access or when serving a single-page experience. Use external sprites on multi-page WordPress sites where browser caching provides meaningful performance benefits across page navigations.
The manual sprite creation process taught in this tutorial, while more time-consuming than automated tools, develops a deep understanding of how SVG Sprites work at the fundamental level. This understanding makes you better equipped to debug issues, configure automated tools effectively, and make informed decisions about when and how to use sprites in your projects.
The SVGO optimization step is particularly important. Production themes should never include unoptimized SVGs — the file size difference between raw design tool output and SVGO-optimized output can be 50% to 80%, and removing unnecessary metadata and attributes makes the sprite cleaner and easier to maintain.
| NEXT STEPS Building on What You Learned
Explore automating SVG sprite generation with svg-sprite or gulp-svgstore. Experiment with CSS animations on sprite icons using @keyframes and transition properties. Consider a sprite workflow that integrates with your design system to automatically export icons from Figma or Sketch into sprite-ready SVG format. |
FAQ – SVG Sprites in WordPress
1. What is an SVG Sprite?
An SVG Sprite is a single SVG file that contains multiple icons defined as symbols, allowing you to reuse them across your site with the <use> element.
2. Why should I use SVG Sprites in WordPress?
They reduce HTTP requests, improve page load speed, and provide better control over icon styling and scalability.
3. What is the difference between inline and external SVG sprites?
Inline sprites are embedded in the HTML and allow full CSS/JS control, while external sprites are separate files that can be cached for better performance on multi-page sites.
4. How do SVG Sprites improve performance?
Instead of loading multiple icon files, the browser loads a single sprite file, reducing network requests and improving load times.
5. What is SVGO and why is it important?
SVGO is a tool that optimizes SVG files by removing unnecessary code, reducing file size without affecting visual quality.
6. Can I style SVG icons with CSS?
Yes, you can control SVG colors, sizes, and hover effects using CSS properties like fill, stroke, and currentColor.
7. Are SVG Sprites responsive?
Yes, SVGs are resolution-independent and scale perfectly on all screen sizes without losing quality.
8. Is SVG Sprite better than PNG icons?
Yes, SVG Sprites are lighter, scalable, and more flexible compared to PNG or JPG icons.
9. When should I use external SVG sprites?
Use external sprites for multi-page websites where caching improves performance across pages.
10. What are common issues with SVG Sprites?
Common issues include incorrect symbol IDs, missing sprite inclusion, hardcoded fill attributes, and wrong file paths in external sprites.
Leave a Reply